 WE SPEAK TO MURDOCK LONDON'S MASTER BARBER TO GAIN HIS EXPERT INSIGHTS
Written by Menswear Style When it comes to growing long hair, it looks its best with soft natural layers - looking as it would if you started from scratch with a one grade all over and just let it all grow out. When grown this way, long hairstyles adhere to our head shapes and hairlines, best complementing our natural features. For this feature we spoke to Alex Glover, the Master Barber at Murdock Londonto gain his expert insights. 1. Mop-top The best method to grow your hair out whilst maintaining a natural look is with a round layer. As soon as you decide you want a longer hairstyle, begin by asking your barber for this with a crop at 3-6 cm, leaving more of a mop-top finish (see old images of the Beatles as they morphed from clean cut boys into hippies for reference). 2. Chewed finish Ok, so hair fringes have the potential to look great on men but I believe they’re best worn with a bold, blunt and chewed finish. 3. Leave it lone Often along the growing journey men will fall for short back and sides cuts in order to achieve some degree of a style whilst still trying to grow their hair out to a desired longer length. These temporary looks tend to graduate in at the edges or have harsh corners, which means that the layers do not grow out as befitting as they would naturally. Avoid trying to craft a style mid-way through the growth phase, as you will often find yourself left with unwanted corners of weight that tend to form wing-like shapes or a dreaded big mushroom effect. 4. Tidy-up if required Whilst avoiding visiting your barber for a drastic mid-growth re-style, broken ends (the man's version of split ends if you like) can lead to splitting all the way down to the root if not treated correctly, so do consider a subtle tidy-up trim to help keep your hair as healthy as possible as it grows. 5. Shampoo & Conditioner The longer your hair gets, the more susceptible it is to look limp and lifeless, so a good quality Shampoo and Conditioner should not be avoided. Always use both (if your hair is dirty) or stick to just conditioner (if you washed it yesterday). For longer curls, invest in a deeply moisturizing product or specific curl activating hair care. 6. Layering If your hair is particularly thick, a heavier layer is required - this layer is cut nearest to vertical - enabling the layers to stack on top of each other over a short area. This prevents strange looking, unmanageable build-ups of weight. These heavy layers then need texturizing deeply to soften out the baseline of the haircut (where the layers end on your shoulders), otherwise it can look a bit feminine from behind. 7. Sea Salt Spray When it comes to styling finer hair, Sea Salt Spray will soon become your favourite go-to product. It helps to make fine hair appear thicker and prevent your style from immediately falling flat once you step out the house. You can trust it to help maintain your shape over the course of the day. 8. Application & Process All hair types can however benefit from using Sea Salt Spray to add texture, blow-drying it in to wet hair before styling to give a boost to the body. Alternatively apply to dry hair to better increase volume and create a matte effect. Depending on your style, you may also wish to work the spray in by hand to design your own natural wave and create a textured body 9. Complimentary Products With Sea Salt Spray providing a great foundation for your style, the best finishing products to use on long hair are crème waxes (such as Murdock Hair Play) which help to control frizzing and provide a soft, lightweight texture and a natural shine. They also add further weight which can help to keep your style tucked back. Don’t be afraid to be fairly heavy-handed over the sides and stay looser on the top to create more of a wave effect. 10. Brush it Remember to regularly brush or comb your hair to help maintain a voluminous natural shape. At home it's best to use a brush because they work well to smooth out hair cuticles and they don't pull on hair as much as combs. When you're out and about however, a longer haired gent's best friend can be the Kent comb he keeps in his top pocket. (source)  A good quality pair of hair clippers will not only save you a lot of money and time, they will also last you many years if you look after them properly.
If your clippers are in frequent use, you really need to ensure they are in good working order. Some basic care and maintenance every now and again will keep your clippers performing to their best. Clipper Care and Maintenance 101 Save a lot of time and money by taking care of your clipper. According to Clipper Guy Ivan Zoot for Andis, many clipper problems arise because of insufficient lubrication and not using enough oil between uses. If you don't have a regular clipper maintenance routine, start today: ADJUSTMENT: Pick up your clipper, turn it sideways and check it. The blades should be either parallel with the cutter blade or set slightly back. If you own a clipper you have to own a screwdriver! Loosen the two screws on the back of the blade, wiggle the blade to adjust it as necessary and tighten the screws. Walk the screws all the way down. GIVE YOUR BLADE A GOOD OLD BRUSH: Most clipper sets come with their own small clipper brush and cleaning kit. However, these brushes are just too small. Use an old, hard toothbrush to really get in among the ‘nooks and crannies’. With the clipper off, brush off the blade. Brush off any loose or accumulated hairs that are between the blade. Having hair stuck between the blades acts like sand or gravel, which can dull your blade quickly. 5 POINT OILING: This is paramount to the care and maintenance of your clipper blade. After adjusting and brushing, apply three drops of oil on the teeth, and one drop on each inside corner of the moving blade. Let the clipper run the oil through the blade. Wipe up any oil around the blade. You should NOT SEE any extra oil, because too much oil can attract hair, dust and dirt, which will therefore gunk up the blade. You are ready to cut! HOT BLADE: If your blade gets too hot, spray it with Cool Care Clipper Spray. It instantly drops the temperature of the blade. It’s also a good cleaner, rust inhibitor and a light lubricant (doesn’t take the place of oil) and it’s a broad spectrum disinfectant. 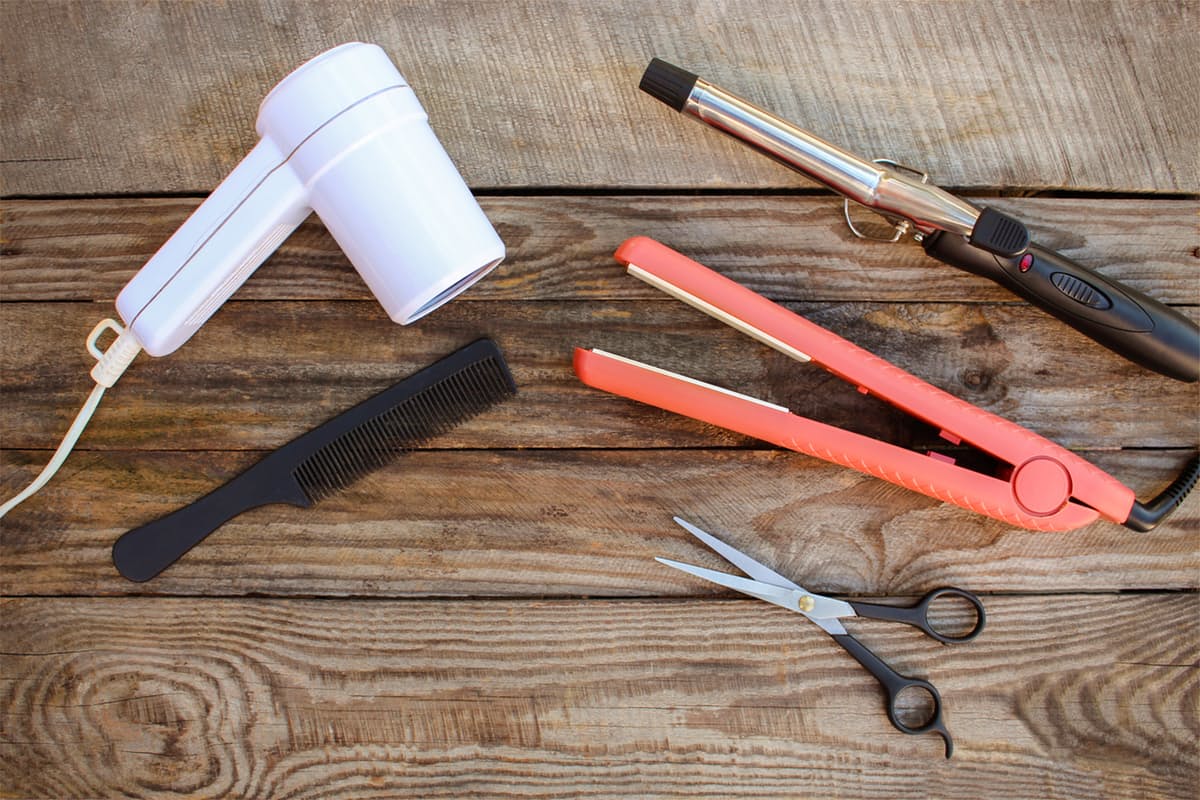 When was the last time you wiped down your curling iron or cleaned out the back of your hair dryer? If you can't remember—or you didn't even know that was a thing you had to do in the first place—then it's definitely time for a deep clean before your next styling session.
Tackling Your Linty Hair Dryer Notice how the vent on the back of your blow dryer tends to fill up with lint over time? The good news is cleaning it out is simple. The bad news? It can get a little tedious, especially if it's been a while since you've cleaned it out (uh, if ever). What you'll need: A vacuum, a dry toothbrush, soap and hot water, and a pair of tweezers or a toothpick. Instructions: Every hair dryer is slightly different, but regardless of your model, you should be able to pop the intake vent cover off the back fairly easily. Once you're in, eHowsuggests you use the toothbrush to brush away any dust, lint and debris you see. Then, suck out the rest with the hose attachment on your vacuum cleaner. If you still see lint trapped in the back of your hair dryer, use the tweezers or toothpick to pull it out until it's clean. If the vent cover is dirty as well, rinse it with soap and hot water (just make sure you dry it thoroughly before you put it back on). Voila—no more dusty drying sessions! How often you should clean it: Stylecaster recommends cleaning your hair dryer every three weeks, but if you don't use it frequently, clean it whenever you start to see build-up. Cleaning Your Flat Iron and Curling Wand If you've had your hot tools for a long time, you know one thing to be true: Inevitably, your hair straightener or curling iron will be covered in mystery gunk. Okay, so it's not really a mystery—it's more like an amalgamation of all your favorite hair products. It makes your heat styling tools look gross, and it can even get in your hair and make it smell less like your favorite shampoo and more like burnt hairspray. Cleaning your hair irons is pretty straightforward overall, but the difficulty level depends on how caked on all that build-up is. What you'll need: A clean dry toothbrush, cotton balls, a slightly damp cloth, and rubbing alcohol or baking soda (you can also buy an inexpensive hot tools cleaner from Ulta for $5.99, if you prefer). Instructions: First, make sure your tools are unplugged and completely cooled down. Then, pick your poison—determine whether you want to use a heat styling tool cleaner, rubbing alcohol, or baking soda (if you choose baking soda, Good Housekeepingsuggests making a paste of three parts baking soda to one part water). Next, dampen a cotton ball or cotton pad with your chosen cleaner and use it to gently buff away all that nasty gunk. Use the toothbrush—or a Magic Eraser, as per PureWow's suggestion—to scrub away any particularly stubborn build-up. When your tools are clean, gently wipe them down with the cloth. How often you should clean it: Again, it depends on how often you use your curling iron or straightener, but for moderate to frequent use, Stylecaster says you should clean it every two weeks or once a month. Is this going on your weekend to-do list? How frequently do you use and clean your hair styling tools? (source)  Braids are like jewelry for your hair. There isn’t a hairstyle that doesn’t look prettier, more polished or more interesting when it contains a braided embellishment. Whether they’re slicing through straight strands, nestled in a cloud of curls or fashioned into full-on braided hairdos, braids give your look a compelling new twist! There are dozens of types of braids—two-strand twist, three-strand, French braids, Dutch braids, fishtail braids, waterfall braids, box braids, just to name a few. Right now, many of these braids are being fashioned and combined in exciting new ways. For an up-to-the-minute review of the latest braid trends, along with tips for achieving the plaits of your dreams, here’s a report from the hair stylist pros at Matrix.
Read More Here >>>  Pro tip: if you're at a blowout bar and want a style that holds the perfect amount of bounce (who doesn't, right?) ask your stylist to use Kate Middleton as a reference. Widely considered the patron saint of good hair, behind every enviable look is her mane man Rossano Ferretti, who, fun fact, coined the term balayage all the way back in 1987, and revolutionized the industry with his "invisible cutting" technique. Unlike a blunt cut, the method hides any evidence you were even chopping your layers in the first place, and even if you go for a dramatically shorter length, there aren't any harsh ends to serve as an indicator.
Here, Ferretti outlined four golden hair rules to follow for layers worthy of an actual tiara. Keep It Timeless Sure, trendy cuts and colors are fun to experiment with, but when establishing your trademark look, stick to a classic one that feels organically you. "Beauty is about harmony, and I can't cut your hair without taking your personal style and face shape into consideration, so when we do consultations with our clients, I need to know you and what you like, otherwise I won't know how to make you happy," says Ferretti, who notes that most of his clients don't bring in reference photos. "If you bring a picture, of course it makes your stylist's job quicker and easier, but someone else's haircut may not be the best option for you." Guidelines are fine, but Ferretti recommends not working against how your hair naturally is, and before committing to a cut, a thorough consultation with your stylist that touches on how your strands behave and the look you'd like to achieve is always important. "I never really talk about trends—the goal is to be beautiful in your own way, so it's about personalization," he adds. Work With Your Natural Color and Texture At Ferretti's salons, the pro veers away from any treatments that can be overly-damaging on the hair, and even when doing color, he takes a very organic approach. His "Aquarella" technique, which is similar to the "Babylights" effect in that it mimics a gradual lightening by the sun, uses your base color as a reference, and only veers one to two shades from it to add dimension. Rather than covering the first signs of greys with a darker tint on some clients, he'll enlist this method in an effort to avoid too dramatic of a change. "I've been suggesting to people my whole life to use the hair in the most organic way. If you already have a nice haircut, you can follow your natural hair movement when styling, or even air-drying," he says. "Use your hands to separate your hair while it's damp, then pin your curls, layers, or waves into place for a few minutes. Just follow what the hair does, and let it dry in the most organic way." Wash Your Hair Less You've likely heard whispers that washing your hair on the daily isn't necessary, and Ferretti is here to confirm your beliefs. "Shampoo two to three times a week. Really, two times a week would be the perfect balance," he says. "If you wash every day, it tends to create the opposite effect on your hair. If you're oily, the oil comes more often as you wash as the foam in shampoo can strip your hair." How often you deep condition depends on your hair type, but generally speaking, once a week is a good amount to indulge in a mask or treatment. Unless you go to the pool or gym every day, less is more in terms of the lather-rinse-repeat motions, and your blowout has more staying power as a result. Develop a Hair Regime Especially when getting your hair colored, a solid after-care routine is needed to maintain the pristine state of your strands. In addition to your shampoo and conditioner, Ferretti suggests making it a point to use a hair oil and serum prior to styling, especially if you live in an area with a lot of pollution. "You have to give your hair extra protection, especially considering the region, how the water is, and how polluted it is," he explains. "You can have a gorgeous haircut, but if you don't have the correct regime, it won't hold up. In the way a bad cream can ruin your skin, harsh products can impact your hair." (source) |
Hair by BrianMy name is Brian and I help people confidently take on the world. CategoriesAll Advice Announcement Awards Balayage Barbering Beach Waves Beauty News Book Now Brazilian Treatment Clients Cool Facts COVID 19 Health COVID 19 Update Curlies EGift Card Films Follically Challenged Gossip Grooming Hair Care Haircolor Haircut Hair Facts Hair History Hair Loss Hair Styling Hair Tips Hair Tools Health Health And Safety Healthy Hair Highlights Holidays Humor Mens Hair Men's Long Hair Newsletter Ombre Policies Procedures Press Release Previous Blog Privacy Policy Product Knowledge Product Reviews Promotions Read Your Labels Recommendations Reviews Scalp Health Science Services Smoothing Treatments Social Media Summer Hair Tips Textured Hair Thinning Hair Travel Tips Trending Wellness Womens Hair Archives
June 2025
|
Search by typing & pressing enter
 RSS Feed