|
Call it a Mod cut, a shag, a mop top, or just bangs—medium-length, pushed-forward hair is gaining popularity yet again. Douglas Booth (above), Ben Whishaw, and Owen Wilson have all worn it, and these tips will have you primed for the style too. Requirements for Messy Medium Hair
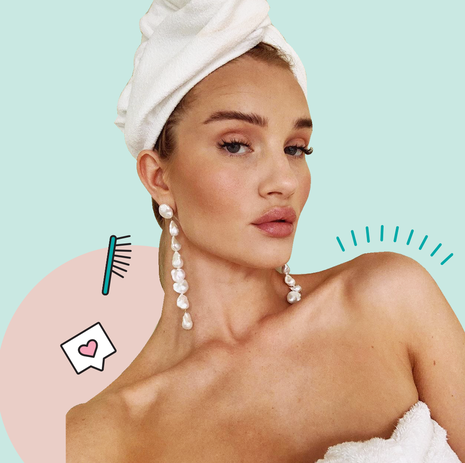
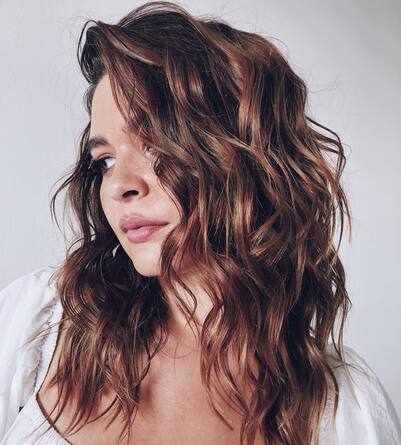
• Hair should be shorter on the sides (a #1 or #1-1/2 clipper length), with a medium high fade before the top of the head. • The length of hair up top should be shorter in the back (2 or 3 inches) and get longer toward the hairline in the front. • Bangs at the forehead should be cut evenly across, and usually long enough so that they fall just above the eyebrow. • The barber or stylist should work in lots of texture here using point cutting techniques—the more weight that’s taken out of the hair, the more movement the cut will have. How to Style Messy Medium Hair 1. Start with clean, towel-dried hair. 2. Use a blow dryer on a high-heat setting to achieve the shape you want. 3. Take a small amount of high-hold pomade or clay and work it into the back of the hair, moving forward (target the roots of the hair for maximum control). You want it to look a little disheveled—and not too precious—when you’re finished. From Birchbox.com This is the easiest guide you’ll ever read. If I’m being completely honest, it’s taken me literal years to learn how to air-dry my hair. It wasn’t until I accepted the fact that successful air drying requires a cocktail of products (lol, trust me when I say those “air-dry creams” won’t actually give you Selena Gomez–worthy waves on their own) plus a handful of techniques (there’s way more scrunching, gliding, twisting, and smoothing than you’d think), that I was finally able to air-dry my straight-ish, poofy-ish hair at home. Why is why I can genuinely say that learning to air-dry your hair isn’t, in fact, an impossible task, as long as you (a) take your time—which, like, what else are you doing right now?—and (b) follow the right equation for your exact hair texture. And to help you, I rounded up the easiest ways to air-dry everything from straight, fine hair to coarse coils, along with the exact products you need on your team. So put down the hot tools, pour yourself a glass (or three) of wine, and prepare to come out of quarantine with your air-dry routine on lock. How to air-dry wavy hair In theory, naturally wavy hair should be one of the easiest textures to air-dry, but thanks to the fact that not all waves are created equally (@ my super-puffy and undefined-as-hell waves—if you can even call them that), the process definitely calls for a little technique. Here’s what you’ll need: This content is imported from Instagram. You may be able to find the same content in another format, or you may be able to find more information, at their web site.
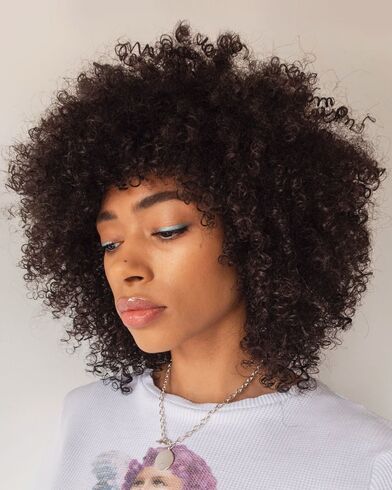
How to air-dry coily hair The key to air-drying dehydrated, pulled-out coils? Adding back crazy levels of moisture and definition throughout the process. Here’s what your setup should look like:
How to air-dry fine, flat hair If you usually rely on a blow-dryer to give your fine, flat hair tons of lift and volume, you’ll love how easy this air-dry routine is. Prepare to get mega volume without all the heat damage: This content is imported from Instagram. You may be able to find the same content in another format, or you may be able to find more information, at their web site.
How to air-dry curly hair If your curls tend to look a little ~fluffy~ and undefined when you air-dry your hair, you need to make sure you’re using leave-in products that build bounce and shape (oh, and some extra shine doesn’t hurt either). Here’s what you gotta know:
How to air-dry straight hair You know those soft, bendy waves you always see on your Instagram feed? Yeah, you don’t need a flatiron or hair dryer to re-create them—just follow these tricks and air-dry some movement into your straight hair: This content is imported from Instagram. You may be able to find the same content in another format, or you may be able to find more information, at their web site.
This was found on Cosmopolitan.com During these days of stay-at-home orders and social distancing, you may be finding yourself in a position of needing some new Do-It-Yourself (DIY) inspiration. And, while your hair maintenance may be categorized as “non-essential” in some circles, we all know nothing is more essential than self-care, right? That’s why I’m sharing these eight amazing and easy-to-follow DIY hair mask recipes you can do right now, from home. So, let’s get started. Banana Mask for Hair Growth
For those of you in a “grow-out” phase with your hairstyle, you’re going to want to give this Banana Mask a try. It takes only four simple ingredients:
When you’re ready, mix all the ingredients in a small bowl and apply to wet hair. The mask should sit on your hair for about 10-15 minutes. One critical thing to remember with this one is DO NOT rinse with warm/hot water unless you want cooked eggs in your hair. The banana will moisturize, the egg gives your hair protein, and the oil helps fight the frizz. I can’t wait to give this one a try, and since I love lavender oil, this one’s at the top of my list. Coconut Oil Mask for Shiny Hair If super shiny, lustrous locks are what you’re after, then this DIY hair mask is the one for you. It uses just three ingredients you most likely have in your cupboard right now:
The coconut oil is a natural detangler and promotes hair growth. It works best on dry hair as it can make your hair feel oily if you use too much or are naturally prone to oily hair. No need to wet your hair for this one. Just melt the coconut oil and honey together in the microwave or on the stovetop. Add the vinegar and stir, making sure it cools down so it’s warm to the touch. Then, apply to your hair with a brush and let it sit for about 20 minutes. To remove, rinse with shampoo and warm water. Aloe Vera Dry Scalp Care Mask Some of you may be like me and suffer from time to time with a dry, flaky scalp. I find this even more true on day two (2) after I’ve washed my hair. If this sounds like you, then you can use this DIY recipe from to fight those dry, itchy spots. The recipe includes:
Did you know aloe vera is a natural antifungal agent? It sure is. It can help relieve your itchy scalp that leads to dandruff. The turmeric helps give your hair strength and can stimulate blood circulation in your scalp, helping your hair follicles stay healthy. Finally, the rosemary and tea tree oils provide regenerative and anti-inflammatory properties that are great for a dry scalp. The “Grease Release” Oat Mask After a long week of self-isolation, nothing feels better than some self-pampering with this DIY, all-natural oat mask for your hair. Simply combine:
Put the ingredients together in a blender or food processor and mix until they form a paste. Put the paste on your scalp and hair for 15 minutes for a mask that helps your hair release its natural oily build-up. Rinse and wash for a fresh, clean feeling. Avocado Nourishing Hair Mask Avocados are one of my all-time favorite foods to eat, and, now, I have another reason to love them. This super simple DIY hair mask uses this superfood for a whole new purpose. Use these ingredients:
You’ll want to mash the avocado in a small bowl until there are no lumps, then add the yogurt and oil to the mix to form the mask. Smooth the mixture on your hair and scalp and leave in place for 30 minutes to get the full benefit of this rich mask. When done, you can wash with shampoo and rinse to remove all remnants of the mask. Your hair will love it. Mayonnaise Wonder Treatment for Dry Hair I’m all about simplicity, and it doesn’t get any simpler than this one-ingredient wonder of a hair mask treatment that includes:
All you have to do is apply the one (1) cup (or less if you have short hair) of mayo of your choice to your dampened hair starting at your scalp and working all the way to the ends. Leave the mask on your hair for 20 minutes then wash thoroughly for glossy, healthy-looking hair. Applying this DIY hair mask once a week can make a world of difference to dry, damaged hair. If you want a deeper treatment, you can apply the mayo to your dry hair, wrap with a warm towel and relax for 20 minutes, then rinse. Yogurt Mask for Color-Treated Hair This luxurious and silky smooth mask is the perfect way to give your color-treated or chemically damaged hair a pick-me-up. According to hair gurus, you’ll need:
Combine all the ingredients in a small bowl until smooth and creamy. Apply the mask to your hair, starting at your scalp and massaging to your ends for about five (5) minutes. If you have long hair, pile it up into a bun and put it under a shower cap, letting the mask soak for about an hour. Then, rinse and shampoo. After just one treatment, your hair should feel soft and supple. Honeyed Coffee Scalp and Hair Mask This DIY hair mask is a gem! The three (3) ingredients you’ll need are:
Mix all three of the above ingredients to form a rich paste that you apply to your scalp and leave in place for an hour. Then rinse and shampoo for silky, smooth hair and an energized scalp. But remember, coffee can be used as a semi-permanent hair dye for brown-colored hair, so try this one in a small area first to make sure it has the results you are seeking. I hope you find one of the above DIY hair mask recipes to your liking. By taking a little time to pamper yourself, you’ll feel and look great whether you’re in self-isolation or preparing for when we can all be together again. In the meantime, stay safe and find joy in the little things, my friends. This helpful information is from The Right Hairstyles Here’s How to Blow Dry It Maybe you’re letting your hair grow a bit longer these days since you’ve been socially distancing from your barber (and you’re a little concerned about the way your spouse or partner is eyeing up that hair trimmer). Or you’ve just decided to try a new longer style. Either way, it’s probably time to brush up on your blow-drying skills. We talked to pro stylists Johnny Gaita of New York’s Chris Chase Salon and Gina Rivera, founder of Phenix Salon Suites to get some pointers on how to pull off award-winning hair. How to Choose the Right Hair Dryer
Gaita emphasizes that it’s worth making an investment in a good blow dryer. “The difference between an inexpensive $20 dryer and a $100 to $200 version is astronomical. The amount of time saved — and effectiveness — is night and day. My go-to brands are Sam Villa, Elchim, or Dyson.” “It’s very important to select the right dryer,” concurs Rivera, who’s also created her own infrared dryer. “Someone who has never used a hair dryer will be most comfortable with less drying time.” You’ll also need a good brush to help with styling. Although you can use your fingers, Gaita recommends a brush for more control. For coarse hair, she recommends sturdy nylon bristles, but for most hair types, natural and plastic bristles from brands like Creative Professional or Denman offer great value. If you’re looking to treat yourself, you can’t go wrong with Y.S. Park, a Japanese purveyor of quality grade brushes. How to Keep Your Hair Healthy While Blow Drying Once you’ve chosen your weapons of choice, it’s time to consider some complementary product to make sure that your hair remains happy and healthy while being exposed to the heat and added stress of styling. “Consider your activity levels,” says Rivera, who also has her own haircare line. “ If you regularly workout, you may need to wash your hair a bit more frequently. Cleansing the scalp comes into play with this situation. Scalp health is extremely important and part of maintaining a healthy scalp includes ensuring the hair follicles remain healthy and unclogged.” “Your hair’s texture should be considered as part of your routine,” says Rivera. “If you have coarser hair, you may need to wash less frequently. Sometimes over-washing results in drying out the hair and eliminating natural oils. Use a good conditioner to start with to prevent fly-away hair. It’s also good to use products such as a serum if you want to reduce volume. Include a deep conditioning treatment such as a mask in your regimen to add an extra boost of moisture. Coarser hair should be deep conditioned once a week; finer hair; every other week.” How to Blow Dry Properly “Generally speaking when drying your hair you should push it forward toward your eyebrows, then back and forth (left and right) on the head and back toward the crown until you get your hair as straight or as smooth as you like it,” says Gaita. Rivera emphasizes that, of course, the cut is going to influence your hair’s styling. Assuming you’ve already got that handled, she says “For a natural, looser casual look, using your fingers works perfectly. For more volume, tip your head upside down while drying. For a sleeker look, use some styling serum, and style the hair with your brush or comb, drying your hair from the top down. “That’s when you add a little touch of product and you’re good to go,” says Gaita. “I always suggest that guys throw a ski cap on for ten minutes or so in the direction of how you want to wear it to help get rid of excess fluff.” Rivera suggests using a good finishing spray that “allows some movement but also provides just the right amount of hold. For a sleeker look, use a styling gel and comb to slick the hair down.” Click into the article here for recommendation on blow dryers, brushes, and styling products. Some people fill up on trashy reality TV show, others indulge in a pint of ice cream. The guilty pleasure going around at Mane Addicts HQ, on the other hand? Picking split ends. Either through twirling or pulling, any chance to separate the dry, drab-looking dead ends gets us giddy. Our old habits would’ve died hard, but we’re sensible, and decided to seek help from an expert. Ahead, the reason why you shouldn’t pick split ends, according to Lee Rittiner, executive stylist at Alen-M Salon in Los Angeles, who keeps a fresh cut on some of our favorite Instababes, including Sazan Hendrix and Rocky Barnes.
What exactly are split ends? How are they formed? A split end is just what it sounds like. The end of a hair strand that’s damaged, resulting in the strand separating into two or more fragments. Split ends are the result of damage to your hair, either from heat, combing, washing, coloring or even wearing a ponytail. When you damage your hair, the outer layer (the cuticle) starts to peel away, leaving hair frizzy looking and more prone to breakage and splitting. So, how bad is it to pick split ends? You can damage your hair further. I describe it to clients like a thread on a knitted sweater—once you pull the thread it will keep unraveling and ruin the garment. Pulling a split end works the same way…so hands off! Will picking your split ends create more split ends? The damage to your hair will come when you tear away at the split ends. Pulling them apart actually makes the problem much worse. Instead of having small splits, you could end up with long lengths of hair that have been thinned as a result of pulling the split end apart. This thinned out hair shaft is more apt to tangle. It may also break off entirely, leaving you with shorter hair that is more prone to even more split ends. Any type of “break” to the hair is not “clean” or blunt like it would be from a scissor cut. Some people acquire hair so damaged that a single hair shaft has multiple splits on it. Do you slow hair growth when you pick split ends? Yes, because it will continue breaking which will not allow the hair to grow longer. What styling products would make your split ends worse? Anything with a high alcohol content will amplify dryness since split ends are looking for hydration. You can find the full article at Mane Addicts |
Hair by BrianMy name is Brian and I help people confidently take on the world. CategoriesAll Advice Announcement Awards Balayage Barbering Beach Waves Beauty News Book Now Brazilian Treatment Clients Cool Facts COVID 19 Health COVID 19 Update Curlies EGift Card Films Follically Challenged Gossip Grooming Hair Care Haircolor Haircut Hair Facts Hair History Hair Loss Hair Styling Hair Tips Hair Tools Health Health And Safety Healthy Hair Highlights Holidays Humor Mens Hair Men's Long Hair Newsletter Ombre Policies Procedures Press Release Previous Blog Privacy Policy Product Knowledge Product Reviews Promotions Read Your Labels Recommendations Reviews Scalp Health Science Services Smoothing Treatments Social Media Summer Hair Tips Textured Hair Thinning Hair Travel Tips Trending Wellness Womens Hair Archives
April 2025
|
|
Hey...
Your Mom Called! Book today! |
Sunday: 11am-5pm
Monday: 11am-6pm Tuesday: 10am - 6pm Wednesday: 10am - 6pm Thursday: By Appointment Friday: By Appointment Saturday: By Appointment |



 RSS Feed