|
6/1/2017 0 Comments As the Chair Turns - June 2017 What's Inside This Month
5 Ways to Make Father's Day Special Essential Tips to Protect Your Hair from Summer Sun Summer Time Air-Drying Hair Hacks Shades of Summer: Rose Gold Things Your Hairstylist Won't Tell You Hair (2017) Tribeca Film Festival Flat Iron Tricks: Waves and Curls New Service: FIBERPlex Bond Enforcing System Ingenious Podcast to Help You Fall Asleep DIY: Pink Salt Hairspray Movies Opening This Month Tips for Handling Hairy Home Situations Coming Soon on DVD / Streaming Redhead Facts That Will Make You Jealous of Gingers Dates for Your Calendar: June Hair Tip: Removing Chewing Gum From Hair Recipe: Salad Dressings to Know by Heart The Story of Hair - History of Hair Brushes In the News: Hair and Beauty
0 Comments
 You may be thinking: “how do they protect their hair from chlorinated pools?” “Every time I go for a dip, my hair turns green or dry…”
Well, the answer is simple; they use a swim cap! But a swim cap isn’t the most handsome thing to wear and it looks quite silly if you’re just going for a dip – even though using a swim cap keeps your hair dry and prevents it from making contact with the metals in pool water. So how do you protect your hair from the pool water? Well, guys let’s take a look.. Who is Particularly at Risk for Chlorine Damage? Everyone who regularly exposes their hair in chlorine water, risks damage, but some hair types are more at risk than others. If your hair type meets the following criteria, you’ll have to take extra care… 1. Color Treated hair (especially if your hair is blonde) 2. Dry Hair 3. Thin or Fine Hair 4. Previously Damaged Hair Rinse Your Hair with Clean Water Before… We spend all spring plotting our perfect summer hair color, only to have it turned to green, dry og frizzy the first time we go swimming, but shower before can solve the problem. Showering before entering the pool sounds a little silly, but really if you rinse your hair with clean tap water it’ll be harder for the pool water to work its way in and cause damage. Wet Your Hair, Don’t Shampoo it It’s important to avoid using shampoo before jumping into the pool. Shampoo reacts negatively with chlorine water and causes your hair to dry out. So remember, the only thing you have to do is to rinse your hair with CLEAN WATER before hitting the pool! Apply Oil or Conditioner Apply a thin layer of coconut oil or conditioner in your hair before swimming to protect it. Oil will act as a barrier between your hair and chlorinated water. The silicones in the conditioner will keep chlorine and other chemicals away from your hair. It will also keep your hair tangle-free. After Swimming: Rinse Your Hair Immediately Rinsing your hair with clean water after swimming is also very important, because the longer the chlorine remains in your hair, the more damage it will cause. If it’s possible, it’s a good idea to use shampoo and some conditioner immediately after you exit the pool. Some shampoos are specially made to help remove chlorine and is a great solution for regular swimmers. If you want to bring a shampoo and conditioner in your swim bag, get By Vilain Skyline Travel Duo. Or use a Leave-In Conditioner – just work the conditioner through your hair after swimming, then gently detangle with the comb. Let Your Hair Air-dry If you use a blow dryer right after a pool day, set on a low or a medium temperature – OR EVEN BETTER – let your hair air-dry! Even though we always recommend you to use a blow-dryer while styling your hair, it’s much better for your hair to air-dry after swimming in pool water. Let your hair dry slowly and use a wide tooth comb! Tip if Your Hair is Already Damage TALK TO YOUR HAIRSTYLIST! If your hair is already chlorine damage, go to a pro. He or she will recommend products or treatments to help. Remember, you can always get a haircut to remove the ends that have suffered the most damage. (Secret tip) USE KETCHUP! If you’re blonde and your hair has turned green after swimming a tip is to use Ketchup as shampoo to correct the green tones. YES we know – it sounds weird and disgusting – BUT it helps! What to do: Shampoo your hair and rinse it out. Apply ketchup in your hair and leave it in for a couple of minutes, then rinse it out. Shampoo your hair again and use conditioner if needed. If you already have tried this secret tip, let us know if it worked! This article first appeared on SLIKHAAR  Is your hair looking a little rough around the edges? Do you feel like you need to put your hair on a damage-control regimen? Not-so-healthy hair can take a toll on our self-image. Thankfully, most causes of breakage and frizz are preventable by changing some of our bad hair behaviors.
Hair damage happens when hair bonds are broken due to stress on the hair. In this article, I’m going to give you the tools to keep your hair healthy and supple by reducing hair stress. I’ll explain how you can prevent damage, repair using treatments and conditioners, and protect with the right products. With extra care and a little prevention, you can get your locks back on the path to strong and lush. Here’s the List: 1. Over-lightening and Frequent Hair Color Damage 2. Texture and Smoothing Treatment Damage 3. Damage From Over-Washing Your Hair 4. Heat Styling Damage 5. Hair Damage from Environmental Stressors 6. Damage From Too Much Tension On Your Hair 7. Damage From Being Too Rough On Wet Hair 8. Damage From Under-Nourished Hair Read here how to Fix - Care - Repair >> 5/13/2017 0 Comments 3 Coconut Milk Masks for Dry HairBy Julyne Derrick
Coconut oils and milks are great for both your skin and your hair. In the tropics, women have been moisturizing their hair with coconut milk for generations. And for good reason, coconut milk is wonderful for keeping hair soft and shiny. Here, I include 3 coconut milk masks for the hair and as an extra bonus, I've included a recipe for making your own homemade coconut milk. Simple Coconut Milk Hair Mask Coconut oils and milks are great for both your skin and your hair. This recipe is a favorite and leaves hair silky and smelling fabulous. What's best about this hair mask is how absolutely simple it is. Plus, there's no need to use all the milk. You can cover the bowl and use again after a few days. Ingredients
Pour a can or bottle of unsweetened coconut milk in a bowl and refrigerate overnight so it hardens. Section hair into 3-5 sections and section, by section, apply the milk from roots to ends of your hair (hair should be dry when applied). Cover head with a shower cap and leave the mask on for about 20 minutes. Rinse hair in the shower and comb out. If you have dry ends but your scalp tends to get oily, apply this mask only to the bottom 3/4ths of hair, keeping it off the scalp. Coconut Milk & Avocado Hair Mask I love the effects of avocado on dry, frizzy hair. This recipe is for shoulder-length hair. Add more if you have long hair. Ingredients
How to Use Wet your hair thoroughly, then comb the mask through from roots to ends. Cover with plastic and a towel or a shower cap if you have one and let the mask sit for 10-30 minutes before rinsing thoroughly. I have found that even 5 minutes helps with these masks, so if you're in a hurry, you can rinse after a few minutes and you won't have to leave the shower. Infused Olive Oil and Coconut Milk Hair Mask You've heard of hot oil treatments, well you can make your own with an infusion of rosemary and olive oil. The milk is added for extra moisturizing benefits. Don't have time to make an infusion? No worries. Just skip that part. Olive oil and coconut milk are wonderful together even without the herb. Olive oil infusions will last for 6 months. Ingredients
Once you have your infused olive oil, you'll make your hair mask by combining 1/2 cup of the infused olive oil and 1/2 cup of the coconut milk. How to Use Apply to hair, cover with a shower cap and let it sit for 30 minutes. Rinse thoroughly. You may feel you need to shampoo your hair after a hot oil treatment, which is fine. How to Make Your Own Coconut Milk While you can buy coconut milk in a can, there's nothing better than homemade just-off-the-coconut milk. Here's how to make your own. Ingredients
Drain the coconut water into a cup. Place the coconut in a pan and bake for 15 minutes. Remove from the oven and place on a large wooden cutting board or other solid work surface. Break the coconut apart with a hammer. Rinse the coconut meat and slice the coconut into small pieces (no need to break the shell away from the meat). Place the coconut pieces and the reserved coconut water in a blender and blend until finely chopped. Put the chopped coconut into a glass bowl with the 4 cups of boiling water. Cover the bowl and let it sit for 30-45 minutes. Using a strainer or cheesecloth, strain the mixture into another bowl. This is your milk. You should have enough for 3 treatments. Store in the refrigerator for up to 2 weeks. This article first appeared on About Style 5/13/2017 Happy Healthy Hair MasquesHappy Healthy Hair – Vitamins and Supplements from Kala Kilshaw 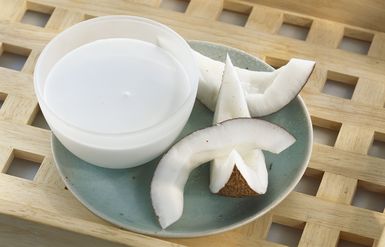 Our hair and nails are the last place to receive the benefits of vitamins and we rarely eat as much of the good stuff as we need. As hair is 91% protein, in order to repair it from the inside out, a regular hair masque is the solution. Many masques available are moisture based so make the hair feel soft and smooth but don’t actually do any internal good. A simple homemade protein based masque is all you need.
These 2 examples are perfect for all hair types, they are a great blend of proteins and fatty acids exactly what we need for Happy Healthy Hair. Ingredients for Banana Hair Masque • 1 banana • ¼ cup of almond milk • 2 tbsp coconut oil • 2 tbsp honey ⚛ Cut banana into small pieces and place in a bowl ⚛ Add ¼ cup of almond milk ⚛ Add 2 tbsp coconut oil ⚛ Add 2 tbsp honey ⚛ Blend or mash until smooth Ingredients for Avocado Hair Masque • 1 pitted avocado • 1 egg yolk • 2 tbsp of either coconut, olive or almond oil ⚛ Place the avocado and egg yolk in a bowl ⚛ Add 2 tbsp of either coconut, olive or almond oil ⚛ Blend or mash until smooth Directions of use: ★ Apply to freshly shampooed, towel dried hair (squeeze water from the hair don’t rub, this prevent roughing the cuticle and causing damage) ★ Cover with a plastic shower cap or bag and a warm towel if possible ★ Leave for 20 mins ★ Comb through gently with a wide tooth comb from end to roots so as not to stress and damage the hair ★ Give your scalp a lovely massage – see details of the benefits above ★ Rinse thoroughly ⚛ 20 mins is perfect timing for treatments and don’t sleep with them in as there are no extra benefits. ⚛ You can add a couple of drops of your favourite essential oil if you want a more fragrant indulgence. ⚛ Drying your hair thoroughly instead of leaving it damp and tying it up will prevent, fungus, scalp problems and breakage. This article first appeared on UKHairdressers.com |
Hair by BrianMy name is Brian and I help people confidently take on the world. CategoriesAll Advice Announcement Awards Balayage Barbering Beach Waves Beauty News Book Now Brazilian Treatment Clients Cool Facts COVID 19 Health COVID 19 Update Curlies EGift Card Films Follically Challenged Gossip Grooming Hair Care Haircolor Haircut Hair Facts Hair History Hair Loss Hair Styling Hair Tips Hair Tools Health Health And Safety Healthy Hair Highlights Holidays Humor Mens Hair Men's Long Hair Newsletter Ombre Policies Procedures Press Release Previous Blog Privacy Policy Product Knowledge Product Reviews Promotions Read Your Labels Recommendations Reviews Scalp Health Science Services Smoothing Treatments Social Media Summer Hair Tips Textured Hair Thinning Hair Travel Tips Trending Wellness Womens Hair Archives
June 2025
|
Search by typing & pressing enter
 RSS Feed